Studio quality light for your zoom conference call on a budget!
How to get studio quality lighting on your Zoom conference calls
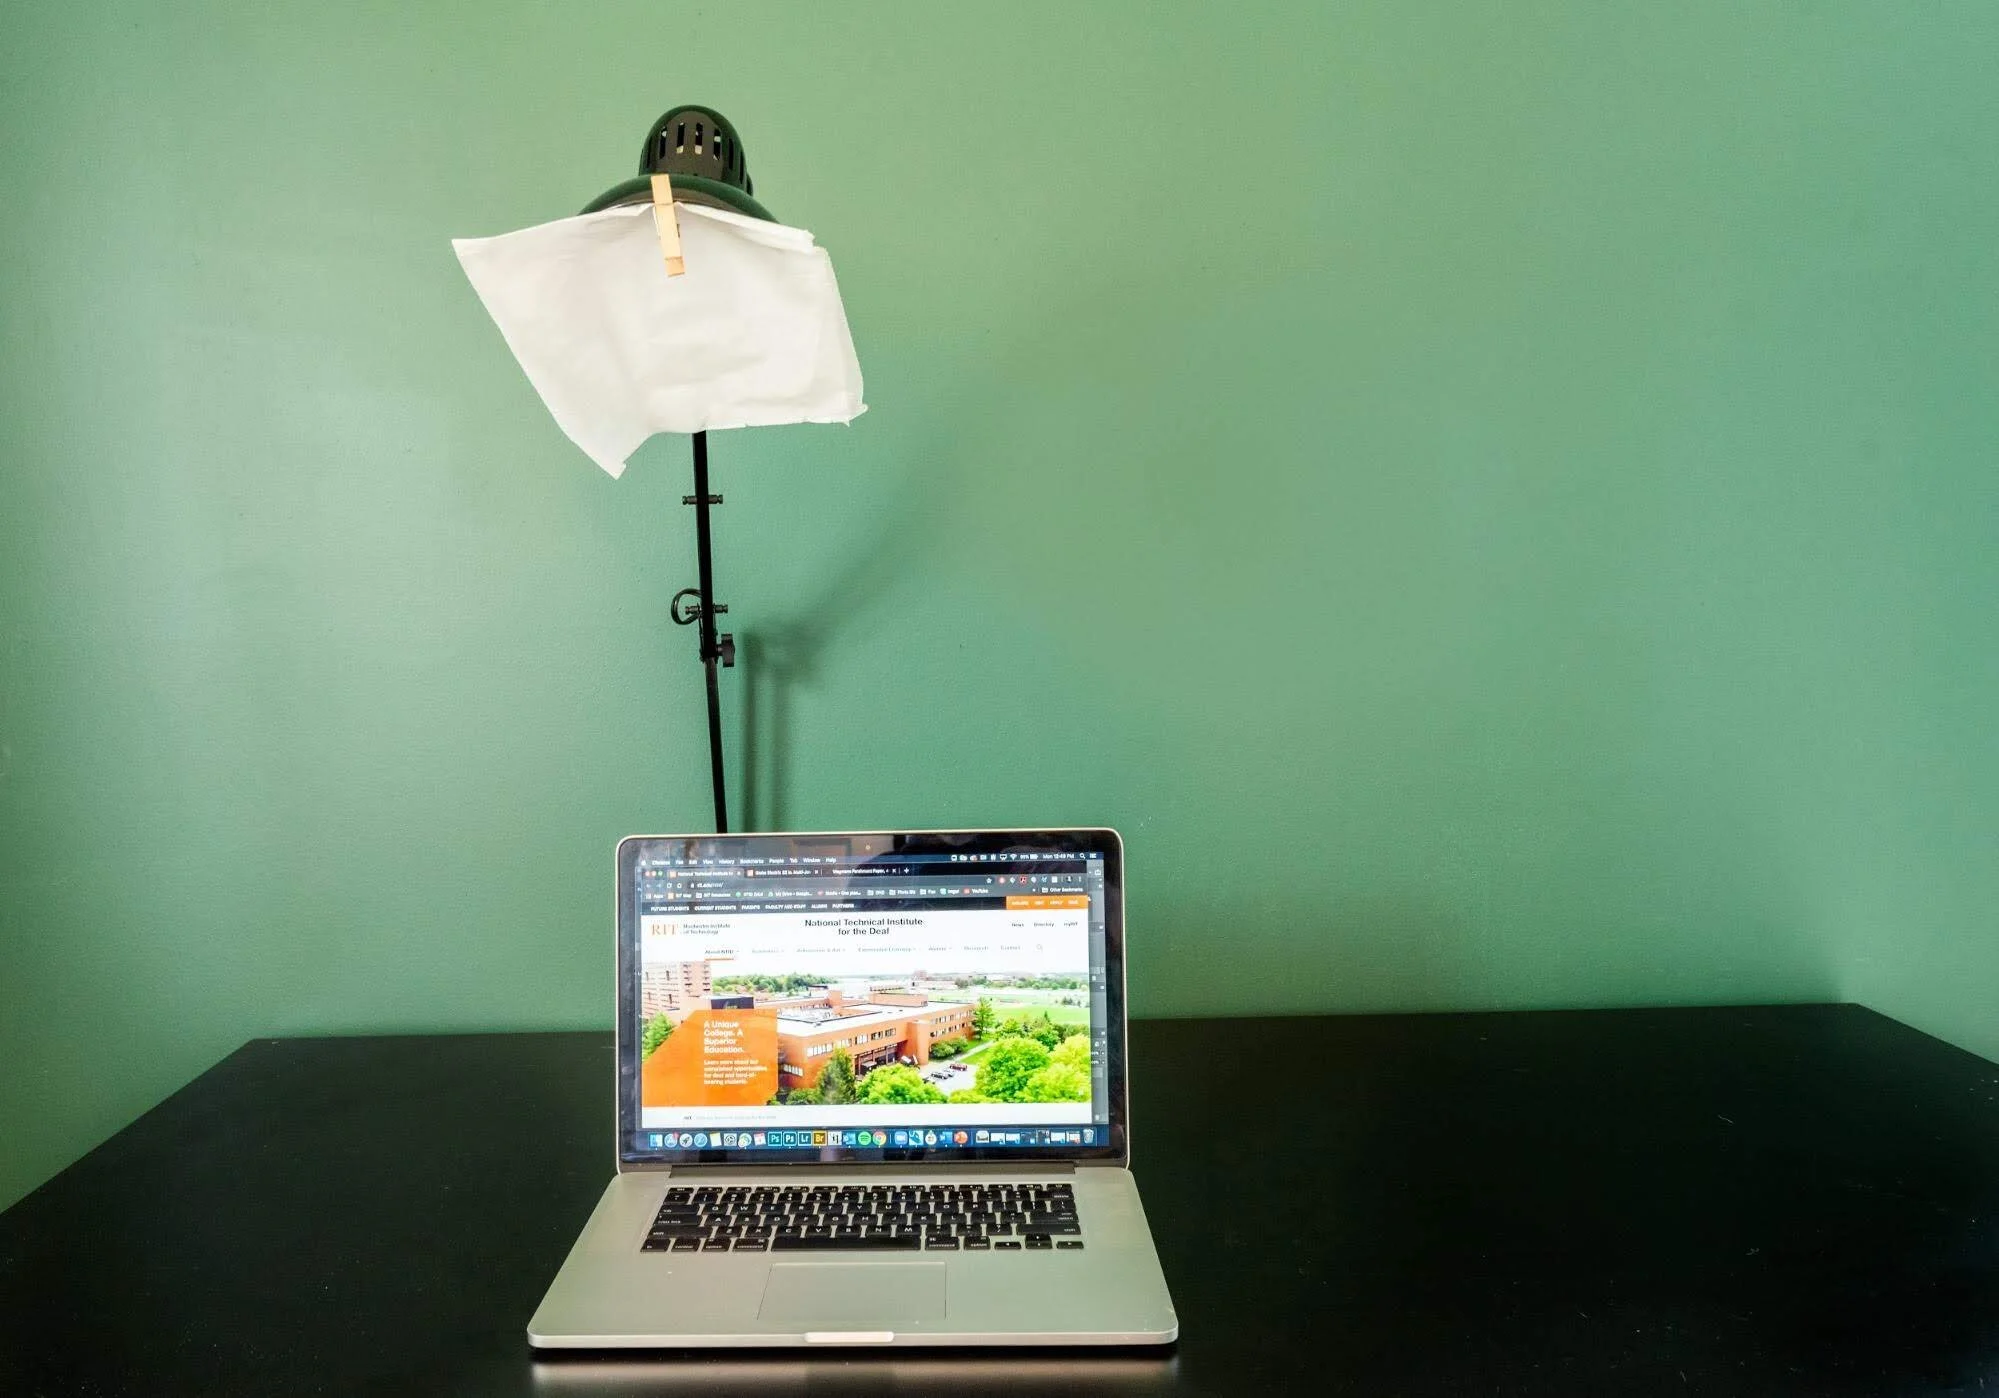
One of the biggest problems I have noticed with the transition to working from home is lighting on conference calls. This is a quick guide to getting close to studio quality lighting using stuff you probably have around the house. If you do not have these items, I was able to find them at any big box store for under $25.
I have noticed that one of the biggest problems people have is there is simply not enough light or the source of light is in the wrong position. This is especially true if you are working in a basement. Ideally, you should position yourself facing a window so that the light is coming from behind your webcam but in case you cannot, here is the next best thing…
BEFORE

AFTER

What you will Need:
Desk Lamp= $20
Oven safe parchment paper = $3
Paperclip/clothing pin/binders clip <$1
Step 1:
Pull out about 8-10 inches of parchment paper, whatever will fully cover your lamp source after folding it in half.


Step 2:
Attach the folded parchment paper to the light source using your clothes pin or binders clip.
Step 3:
Position the light source so that it is in front of you and slightly to one side. The light should be higher than your head and pointing down. It should be pointing down towards you at about a 45 degree angle. Position the lamp so it is out of your line of sight however If you have shadows around your eyes that look like a raccoon, the lamp is too high.

Color Consistency Plagues Photographers
Professional photographers spend lots and lots of money in order to not be tricked by simple color illusions such as the one found here. The simple fact is, you can never guess what lighting condition your clients are going to view your photographs in but you can control the color that gets printed. And most phone screens and computer screens come calibrated to srgb pretty accurately now a days. When I am in the editing bay, I am constantly looking at my histograms because I know I can't ever truly trust my own eyes.
Helpful tips for night time long exposure photography
Here is a guide with some helpful tips and tricks to taking better star photographs.
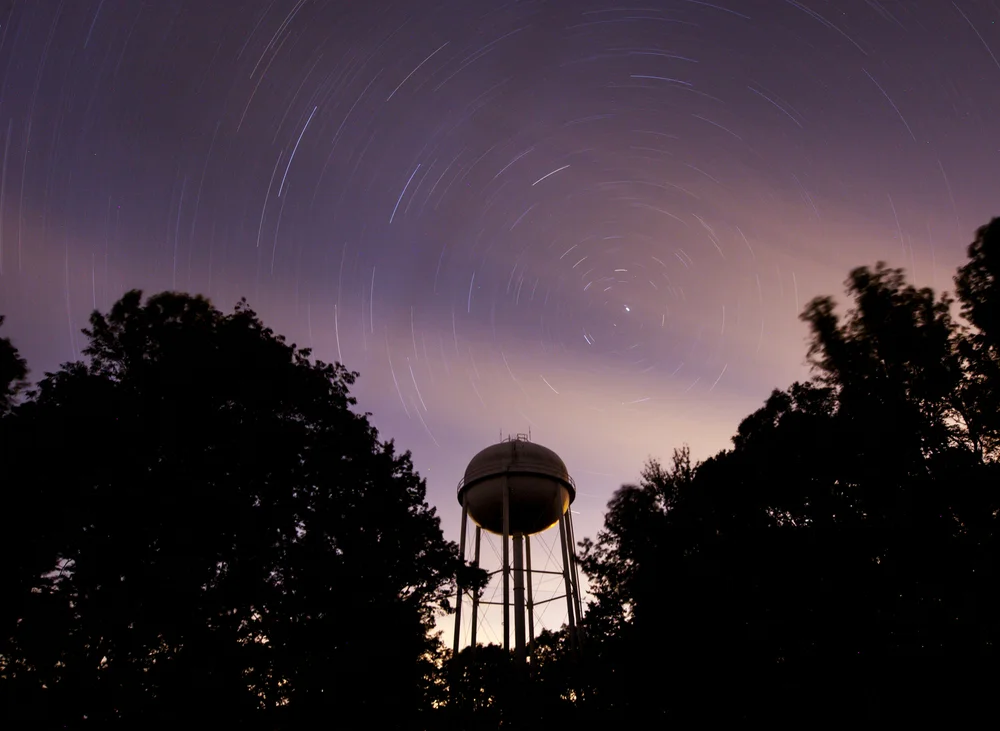
One of the most fun techniques in photography is long exposure. I love heading out on a warm summer night, finding a beautiful subject whether it be a tree or a water tower, or a lake and just watching the stars drift by. In this blog post I hope to give you some helpful tips that will save you time and frustration when starting out taking night sky photographs.
Equipment:
Camera: Make sure your camera has a bulb function or at least can go down to a 20 second shutter speed.
Tripod: after the camera, this is the only other part of this I would say is a requirement You can usually work around everything else, but a solid tripod is the most important investment for long exposure photography. This doesn't mean you need to go buy a $500 Manfroto, but as long as it will hold your camera still and the screw doesn't come loose mid exposure you will be fine.
Wide Lens: Wide lens captures more stars because you have a wider field of view. If you are trying to make the moon look big, go for a telephoto, the longer the better. Ideally you want a lens that can open to at least F2.8 - for more info on len's you can check out my post on What the numbers on lenses mean.
Remote Shutter: This will just save you time. A remote shutter allows you to press the shutter without actually touching your camera. Each time you touch your camera you shake it ever so slightly and it can show up in the photos. For this reason, some of the most expensive cameras have seismographs inside them! If you don't have one, or forget to pack it, one trick I like to do is turn on the delay shutter timer. originally used to give the photographer time to jump into the awkward family photo, now can be used to delay the shutter until the camera stops shaking.
Deck of Cards: When taking long exposures, especially if you are doing a straight 2 hour exposure, you might want something to do while you wait. Other recommendations if you don't like solitaire are a chatty friend, a telescope, or a good book.
Step 1:
Prepare.
Remember the 5 P's. Preparation prevents piss poor photos. I usually scout out places I want to photograph during the day time. Look for a cool landmark or a beat up rusty truck. You are going to want to look for something at least 20 minutes outside of a city or 45 minutes if its a big city like NYC or Chicago. If you are in California, just head for the hills or the desert. You are also going to want to look at the moon calendar. Plan to go on a moonless night, anything larger than a quarter moon drowns out a lot of potential stars. The moon as well as city lights make the sky brighter at night which means your camera wont be able to pick up the fainter starlight.
Step 2:
Set up your shot
Set up your shot how you like it and try to throw some sort of compositional technique in there. Rule of thirds, leading line, Symmetry, any one of those will make it look like you know what you are doing!
Now one of the questions I have been asked is how do you get your focus?! And It took a little creative problem solving to figure out. What I do, and it has not failed me yet, is flick off the automatic focus setting. There should be a switch on your camera and usually there is one on your lens. Switch it off of A or MA and bring it to M. Manual Mode will allow you to set a focus on a certain point and it wont move when you click the shutter. Next I shine my phone-screen's light on my lens to help me see the markings on it, set the focus ring to the infinity symbol. It is usually about a 1 degree rotation in from the very end. Once it is set, don't touch it.
Now your settings are going to be different based off your camera, your lens, and how much light pollution is in your sky, so play around with the settings. Set your White Balance to Sunlight or 5500K and put your quality on RAW for best results. A good place to start is ISO 1600 / F2.8 (or as low as you can get) and set your shutter speed to 20." I find at 30" you have actually had the shutter open long enough to catch a little bit of motion blur in the stars from the earth's rotation.
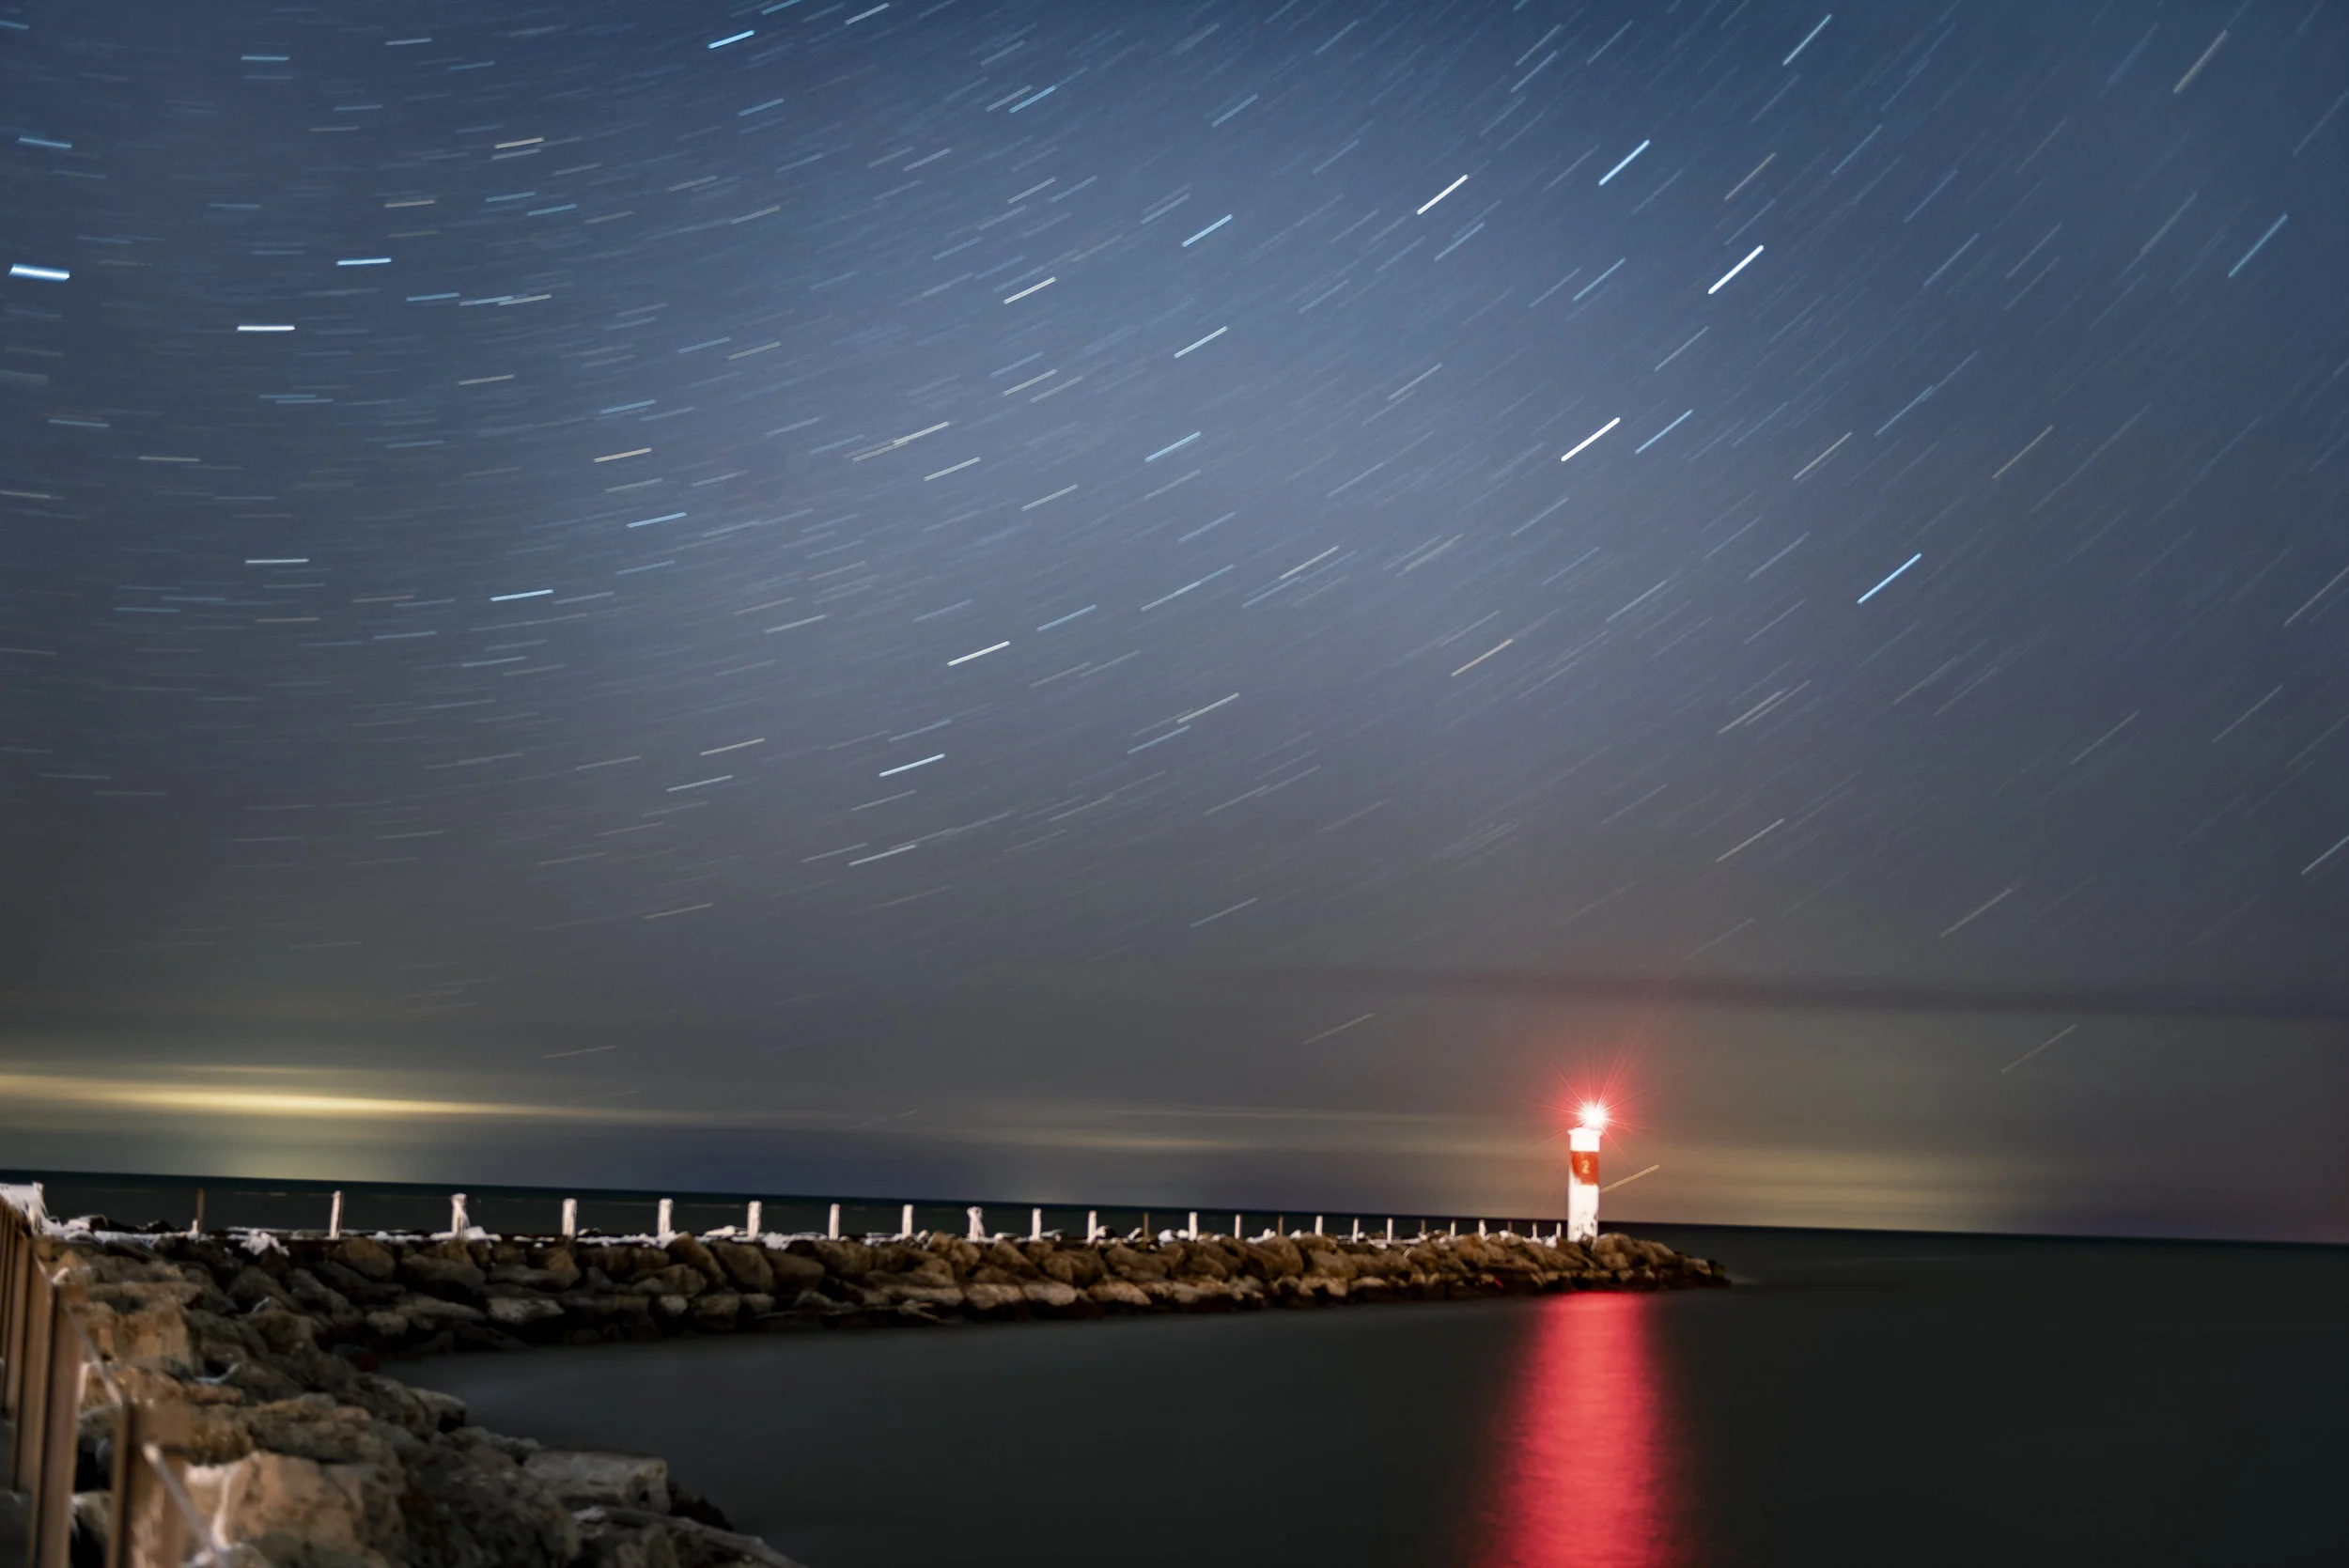
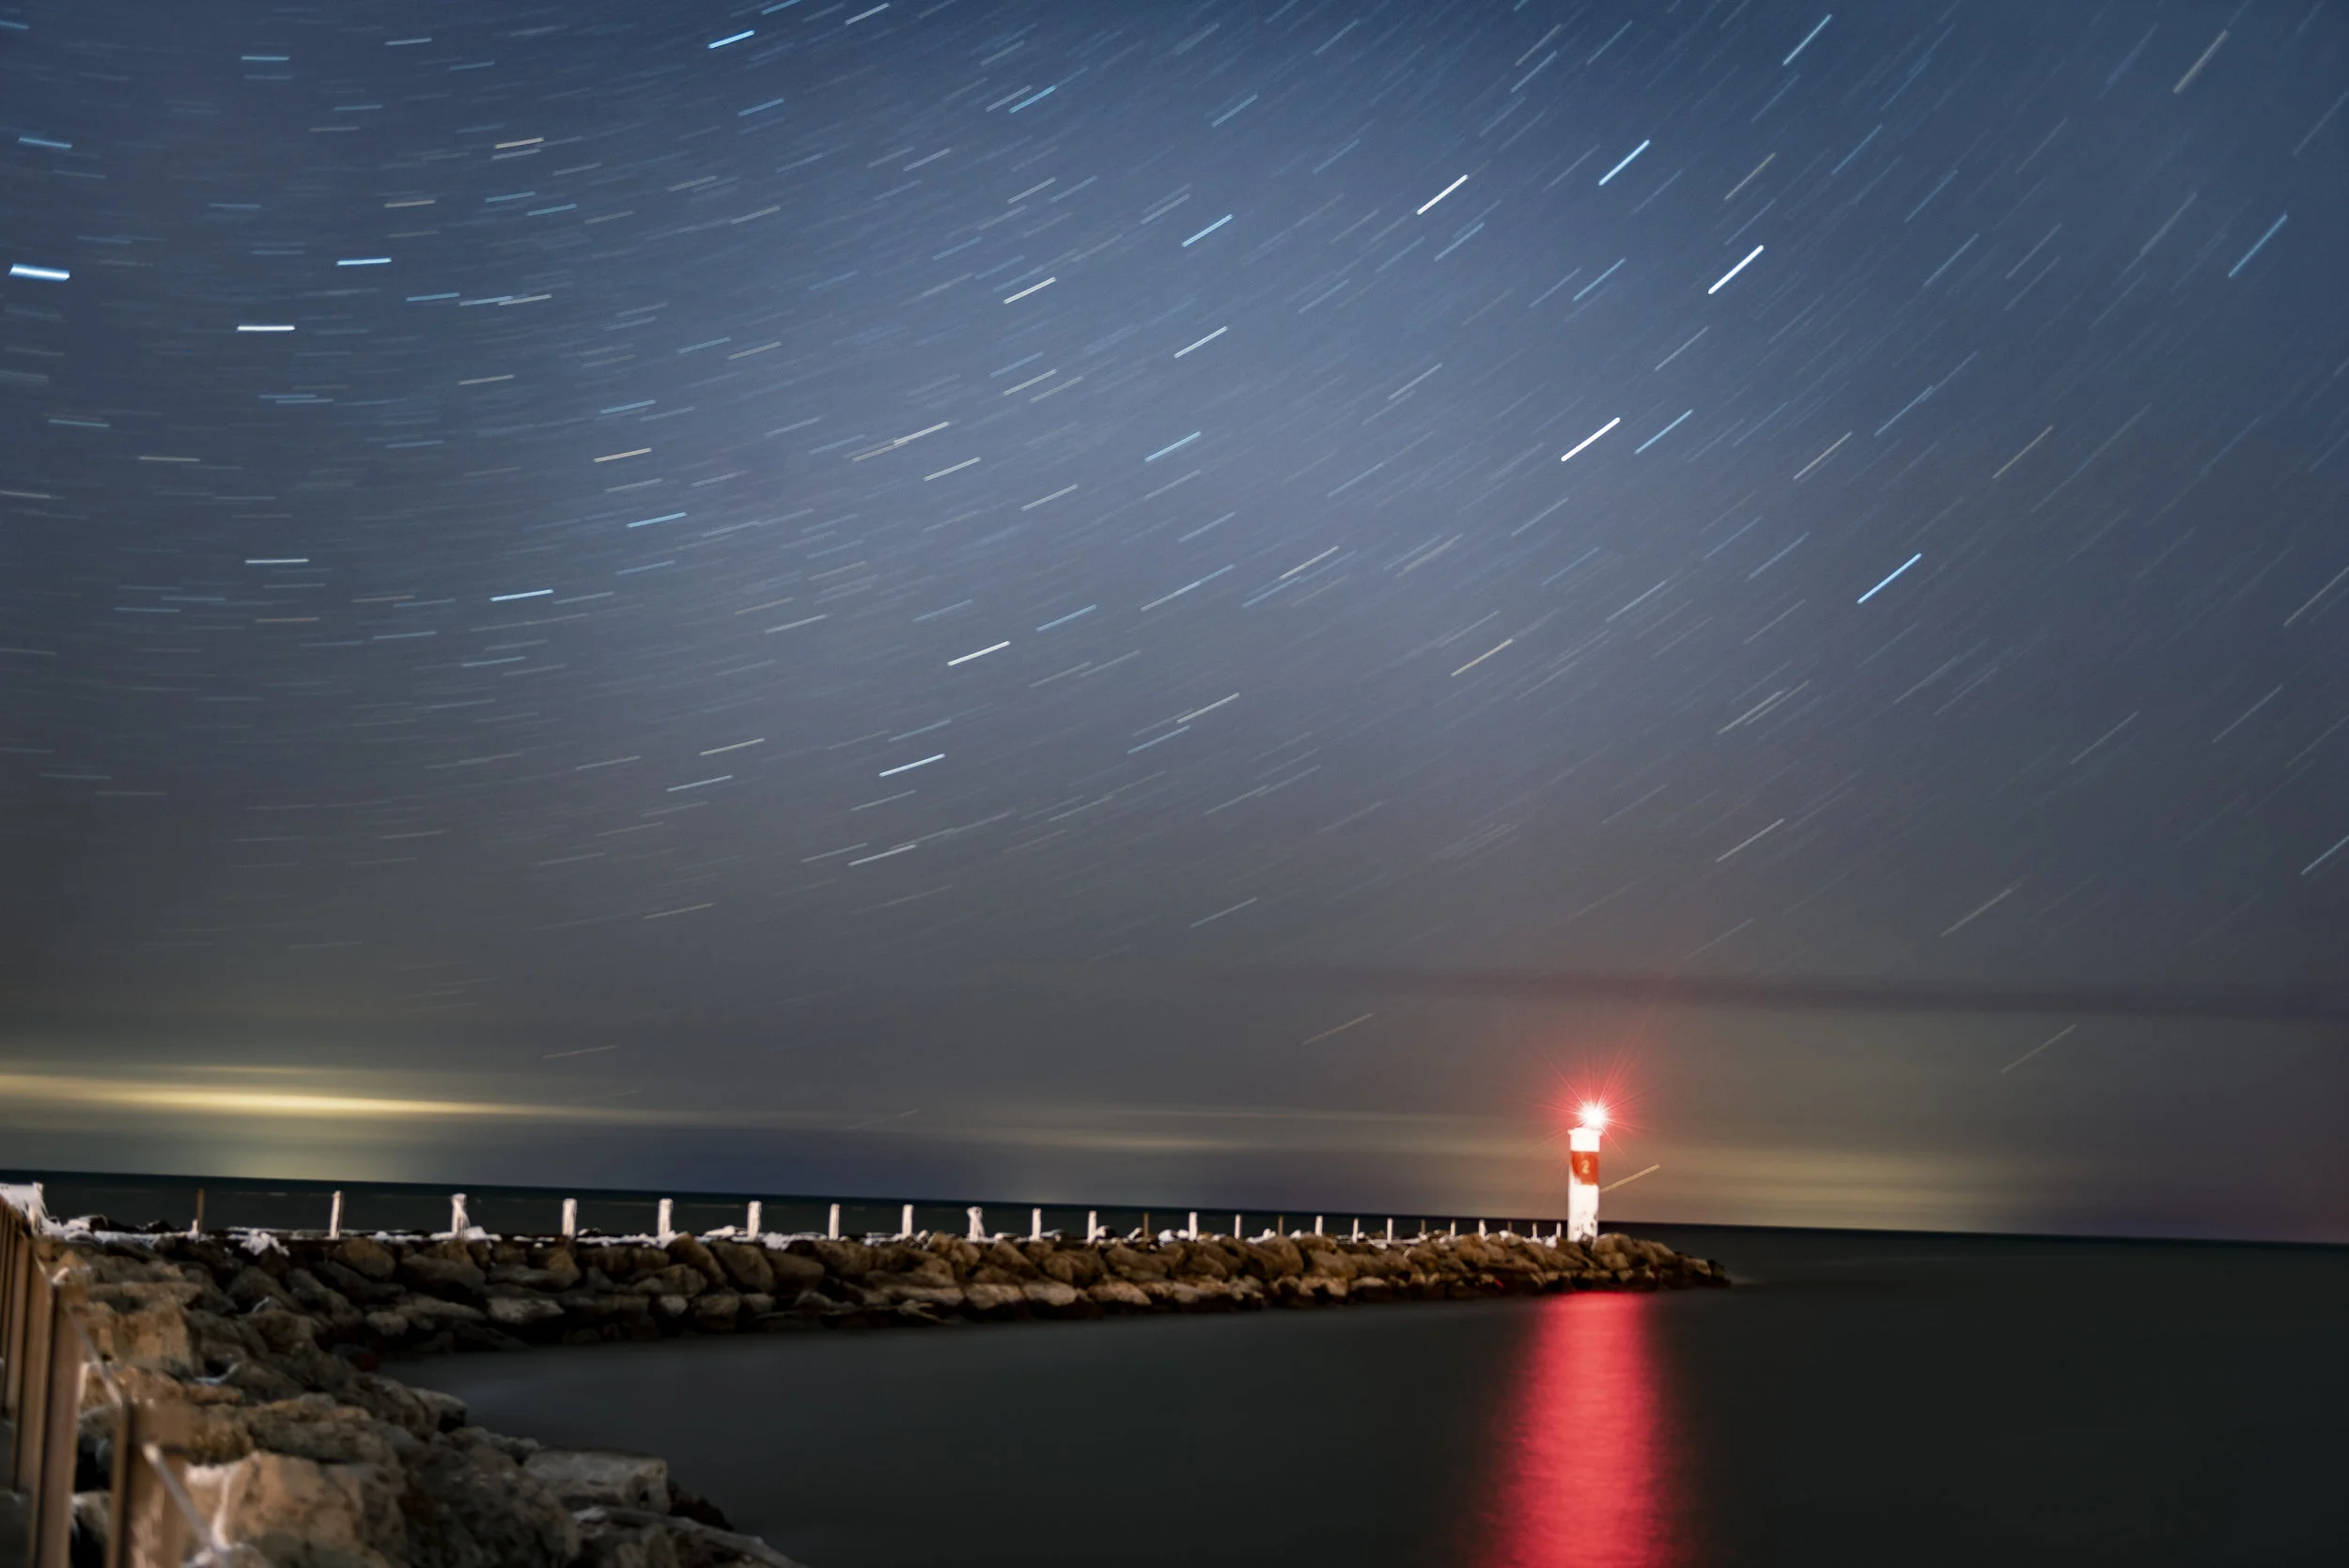
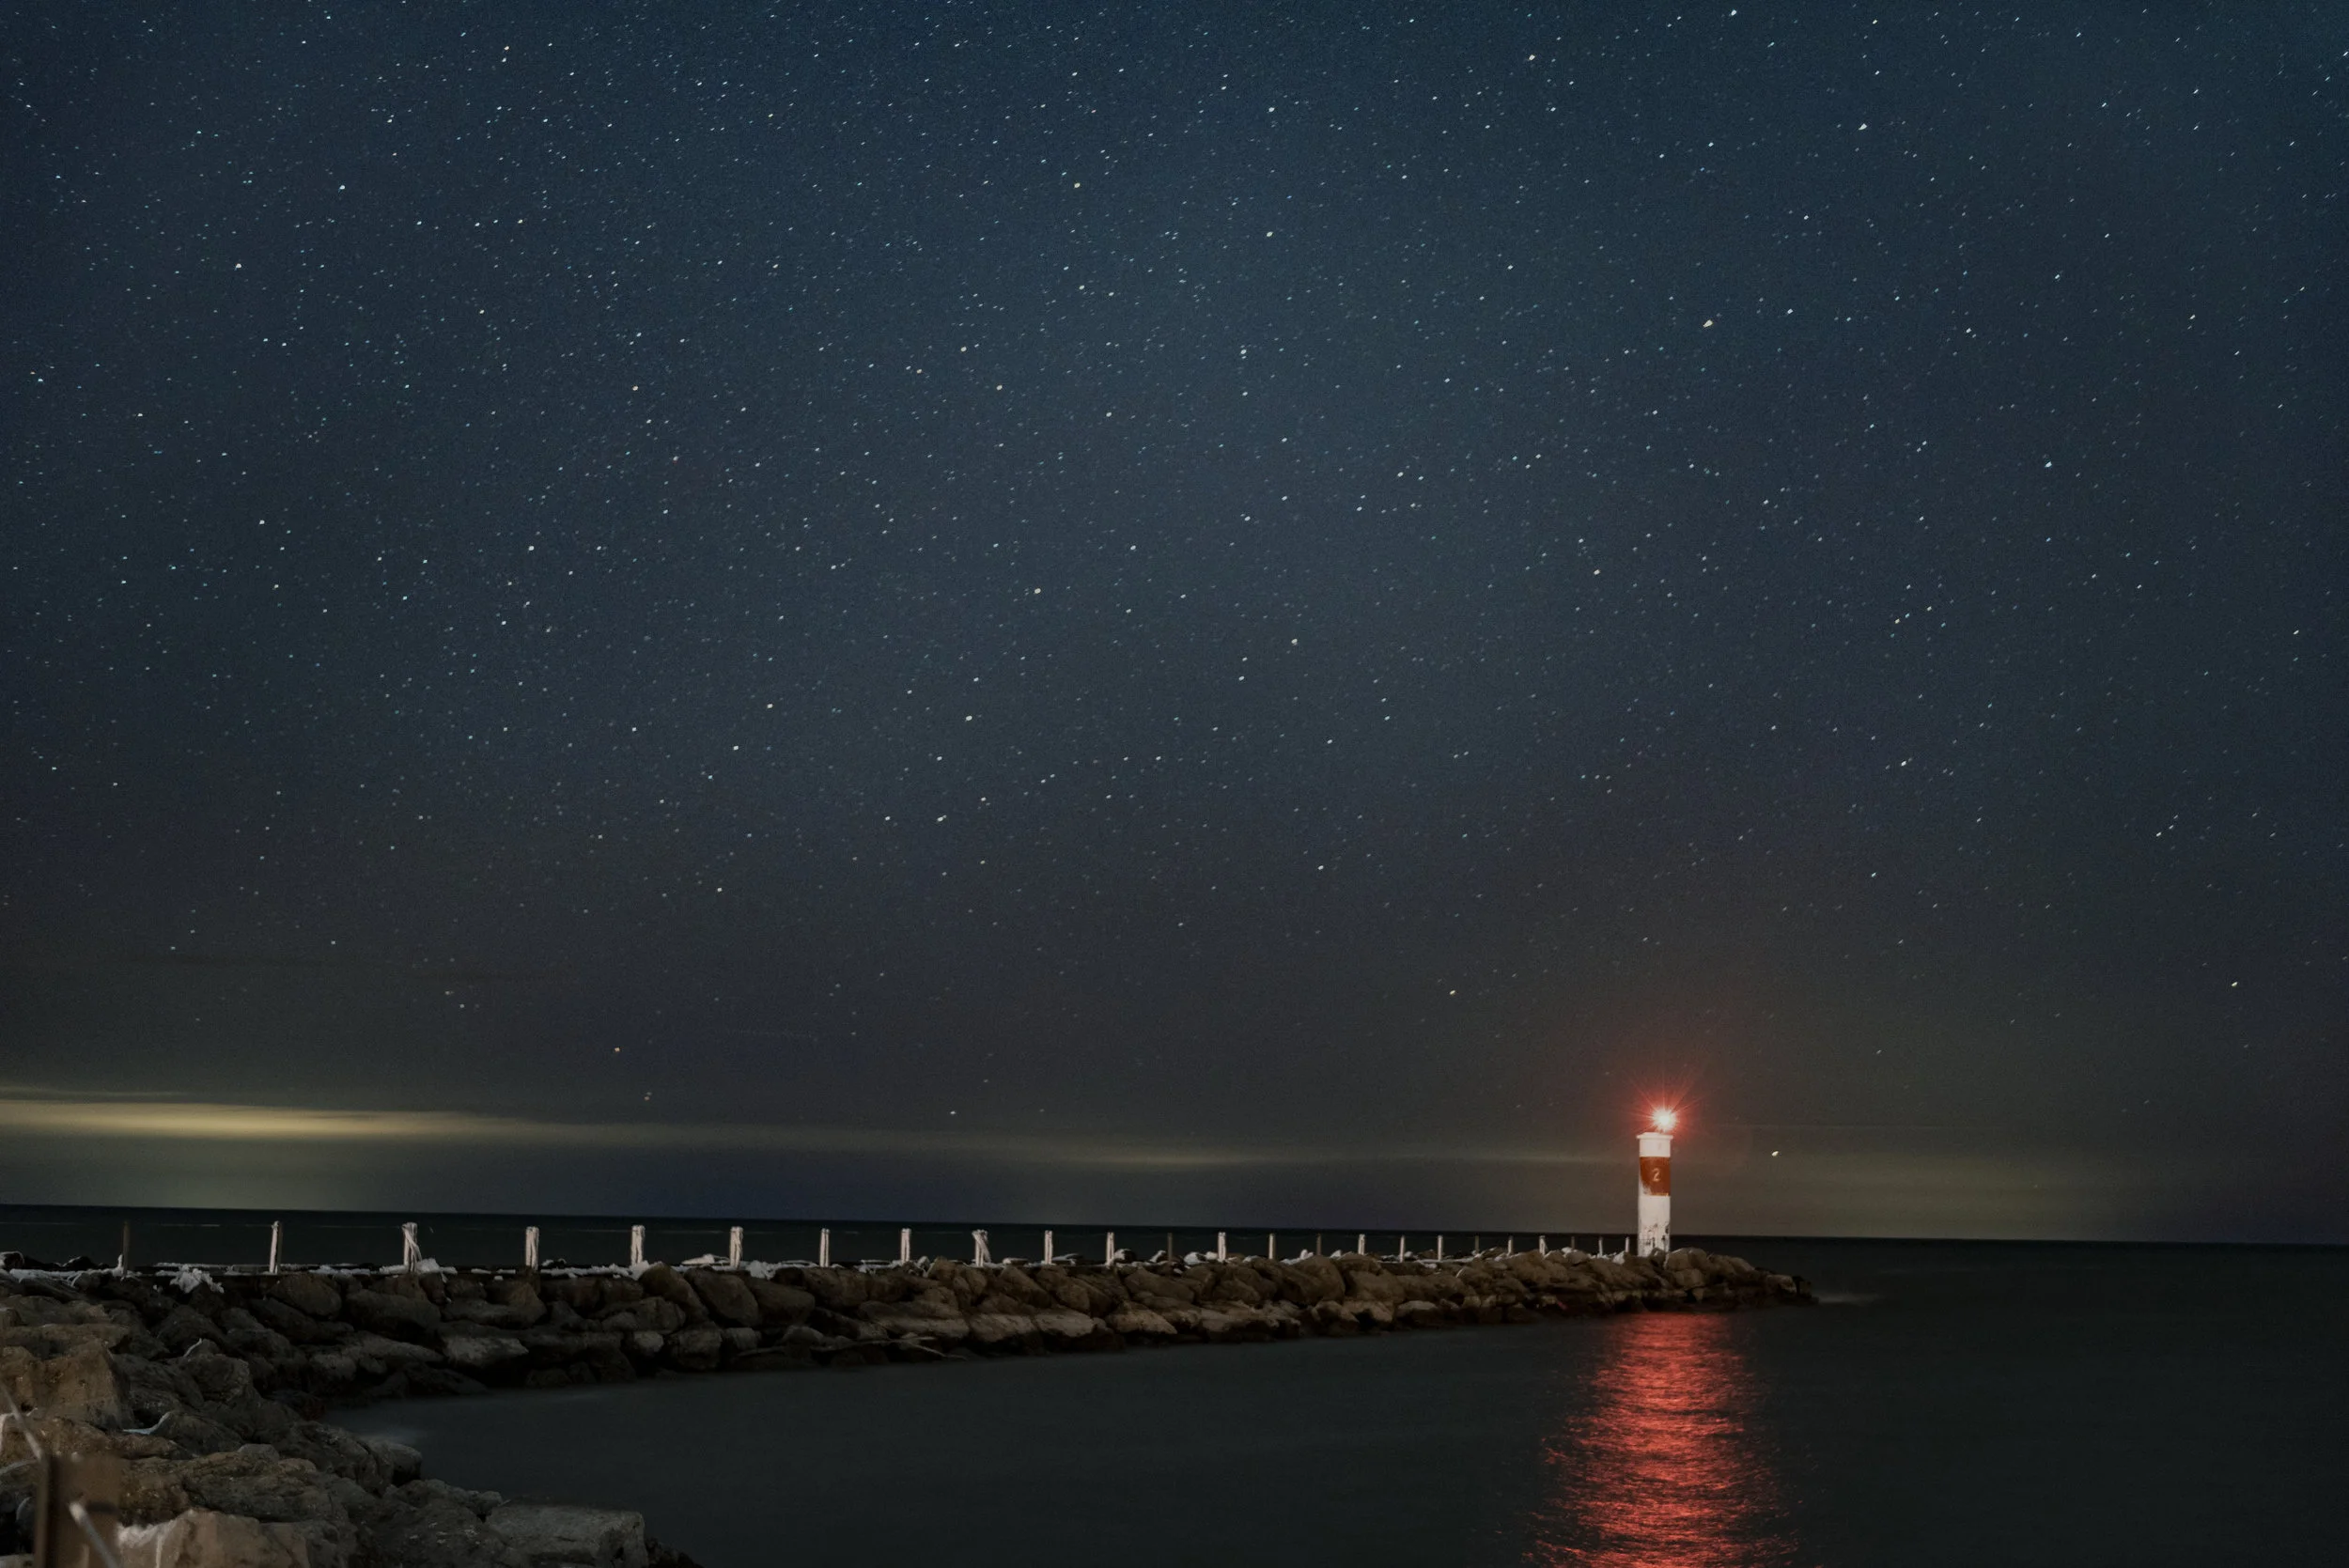
With any luck you should get something that looks like this...
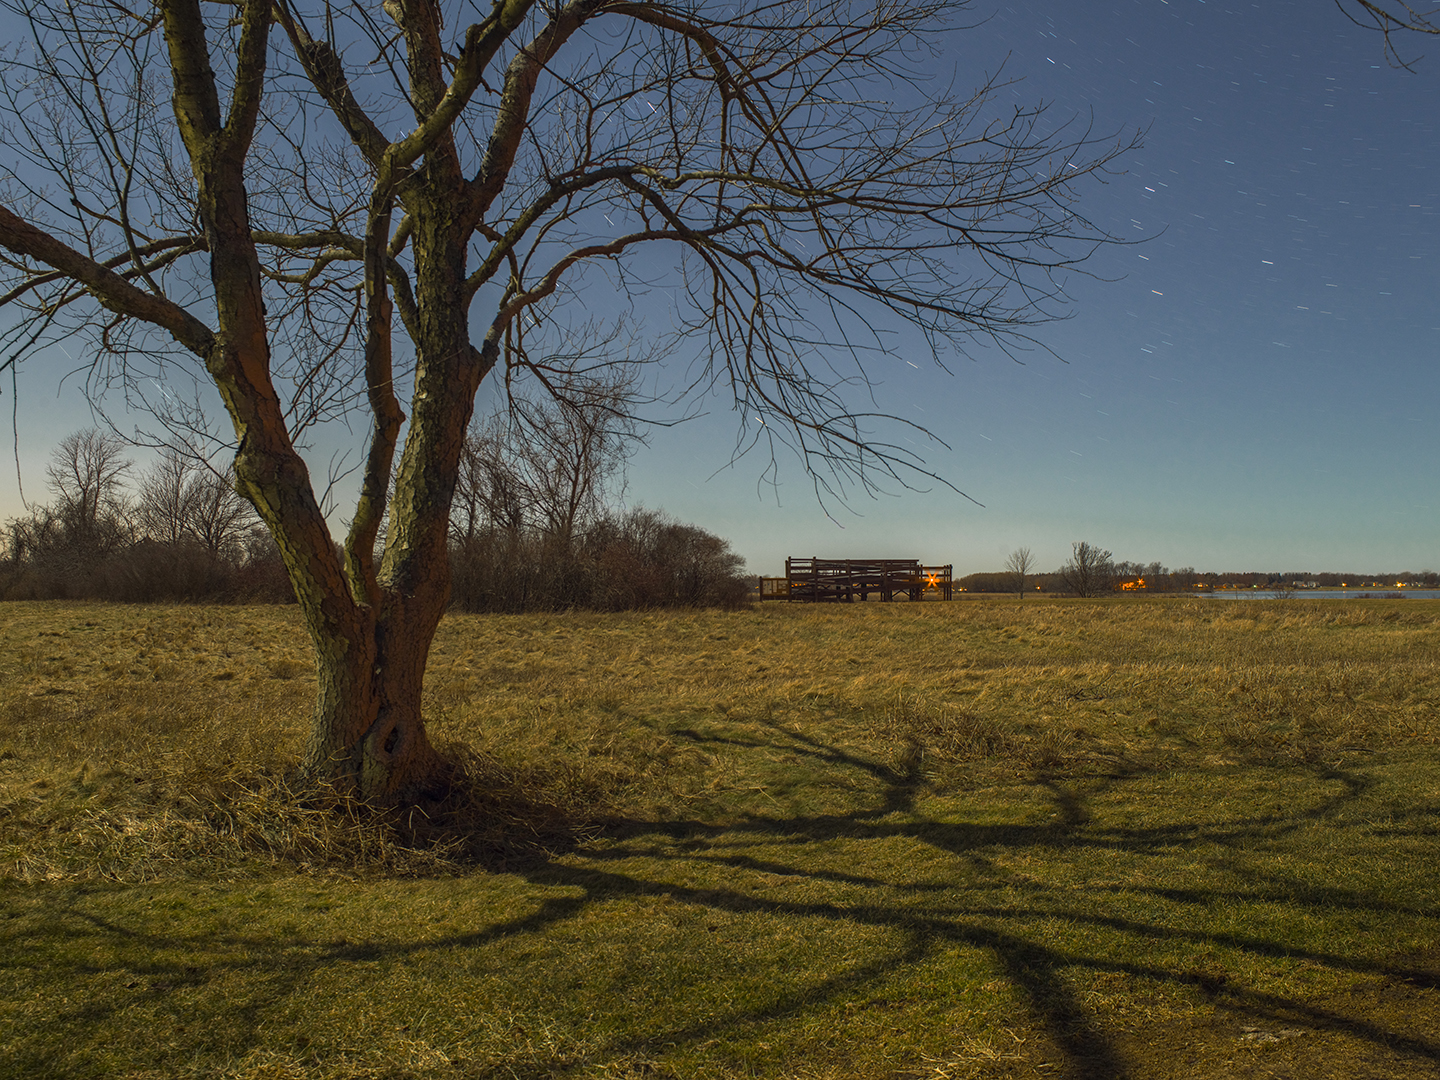
Just for reference, this next photo was taken on a night with a half moon... notice how fewer stars there are and how the moon actually creates a shadow. The photograph looks like it was taken during the day if not for the stars and lights in the background.
Things to keep in mind:
Notice in the second photo how fewer stars you see because the moon is polluting the night sky with light. City lights are even worse which is why you need to travel so far from any big city. If you can put mountains or a large body of water between you and the city, the darker it will be.
Most night sky photos you see on instagram are more than likely composites. Basically photographers take a lot of photos only 10 seconds to a minute long and they stack them together to create what looks like an hour long exposure. It is a really neat trick which can save you the risk of taking a 2 hour photo and having it be overexposed.
The other composite technique which is more common (unfortunately) is to drag and drop a sky from a different photo and put it over a photo of something else. While it may look really pretty to your average instagrammer, you have to realize that this is an unrealistic expectation to have when going out to take night photographs. Personally, I think this technique is cheating, but who am I to judge... Example1, Example2, Example3. At what point do these images become digital art and not photographs?

Now, in order to see the milky way, you have to be looking towards the milky way. I like to use star mapping apps to help me locate certain celestial objects.
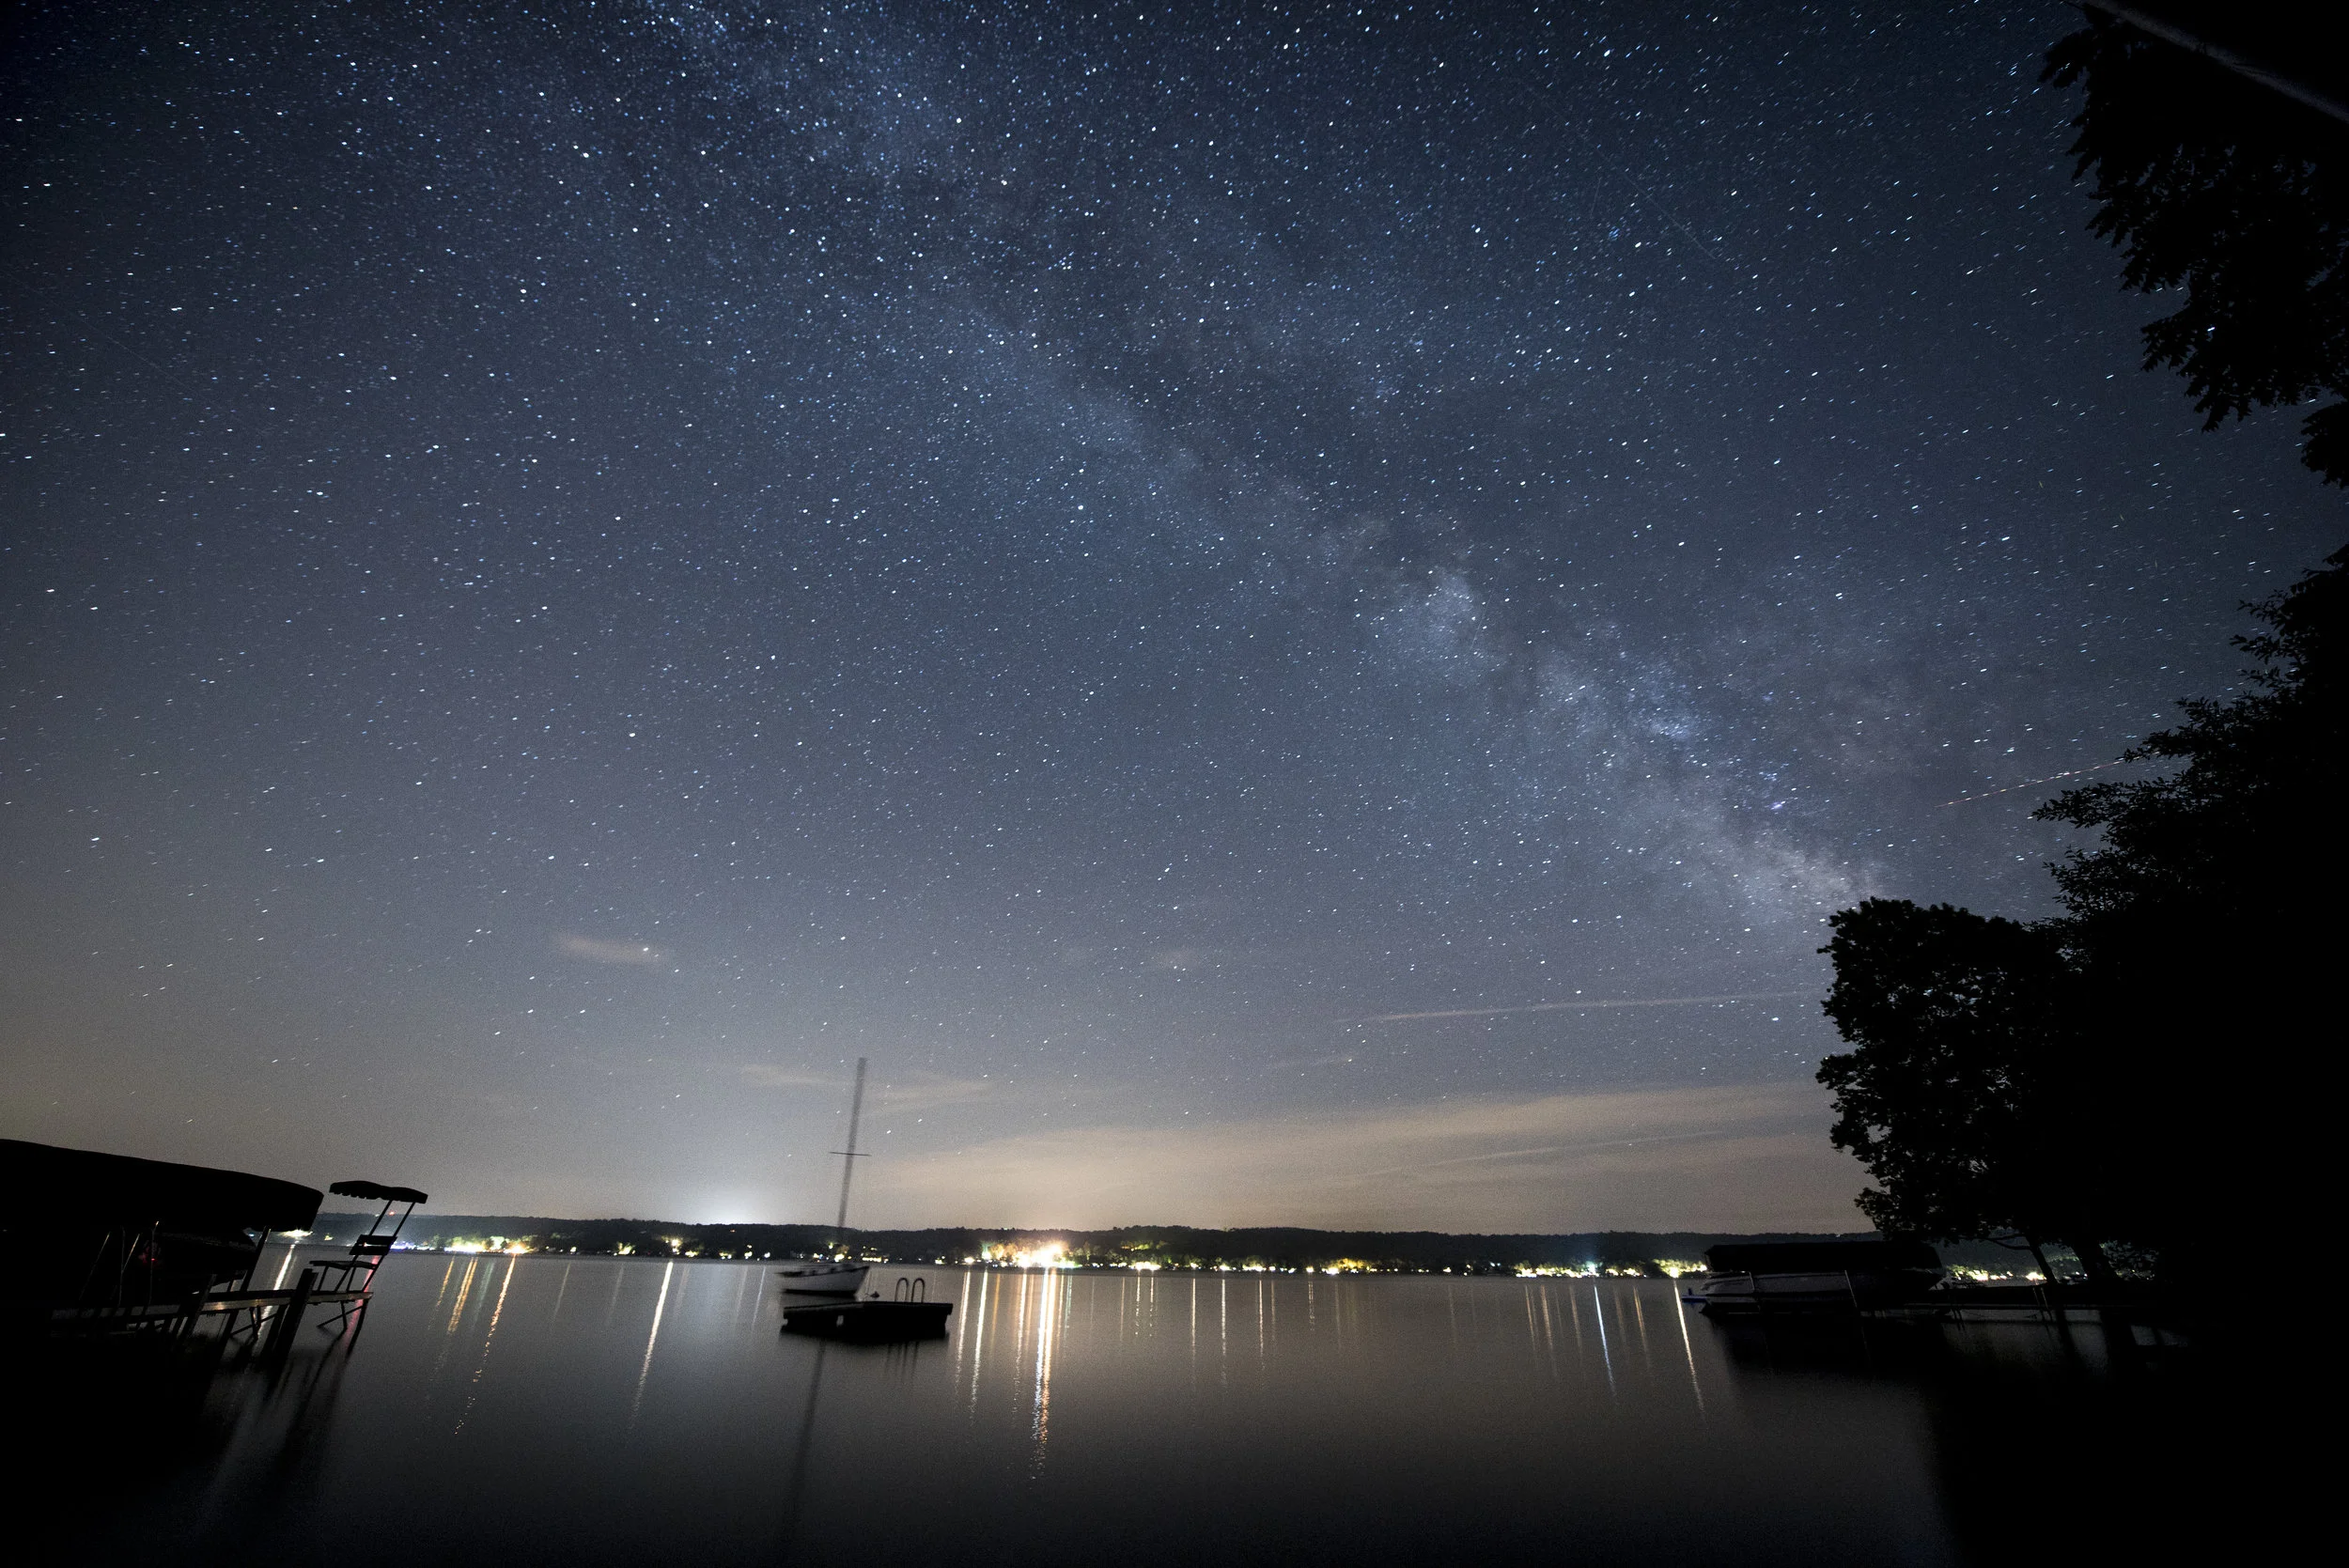
Notice how the lights along the lake actually blot out the stars. If you can spot the milky way with your naked eye, it will show up easily in a photo. Here we see it stretching from the southern sky (camera right) up and over the lake.
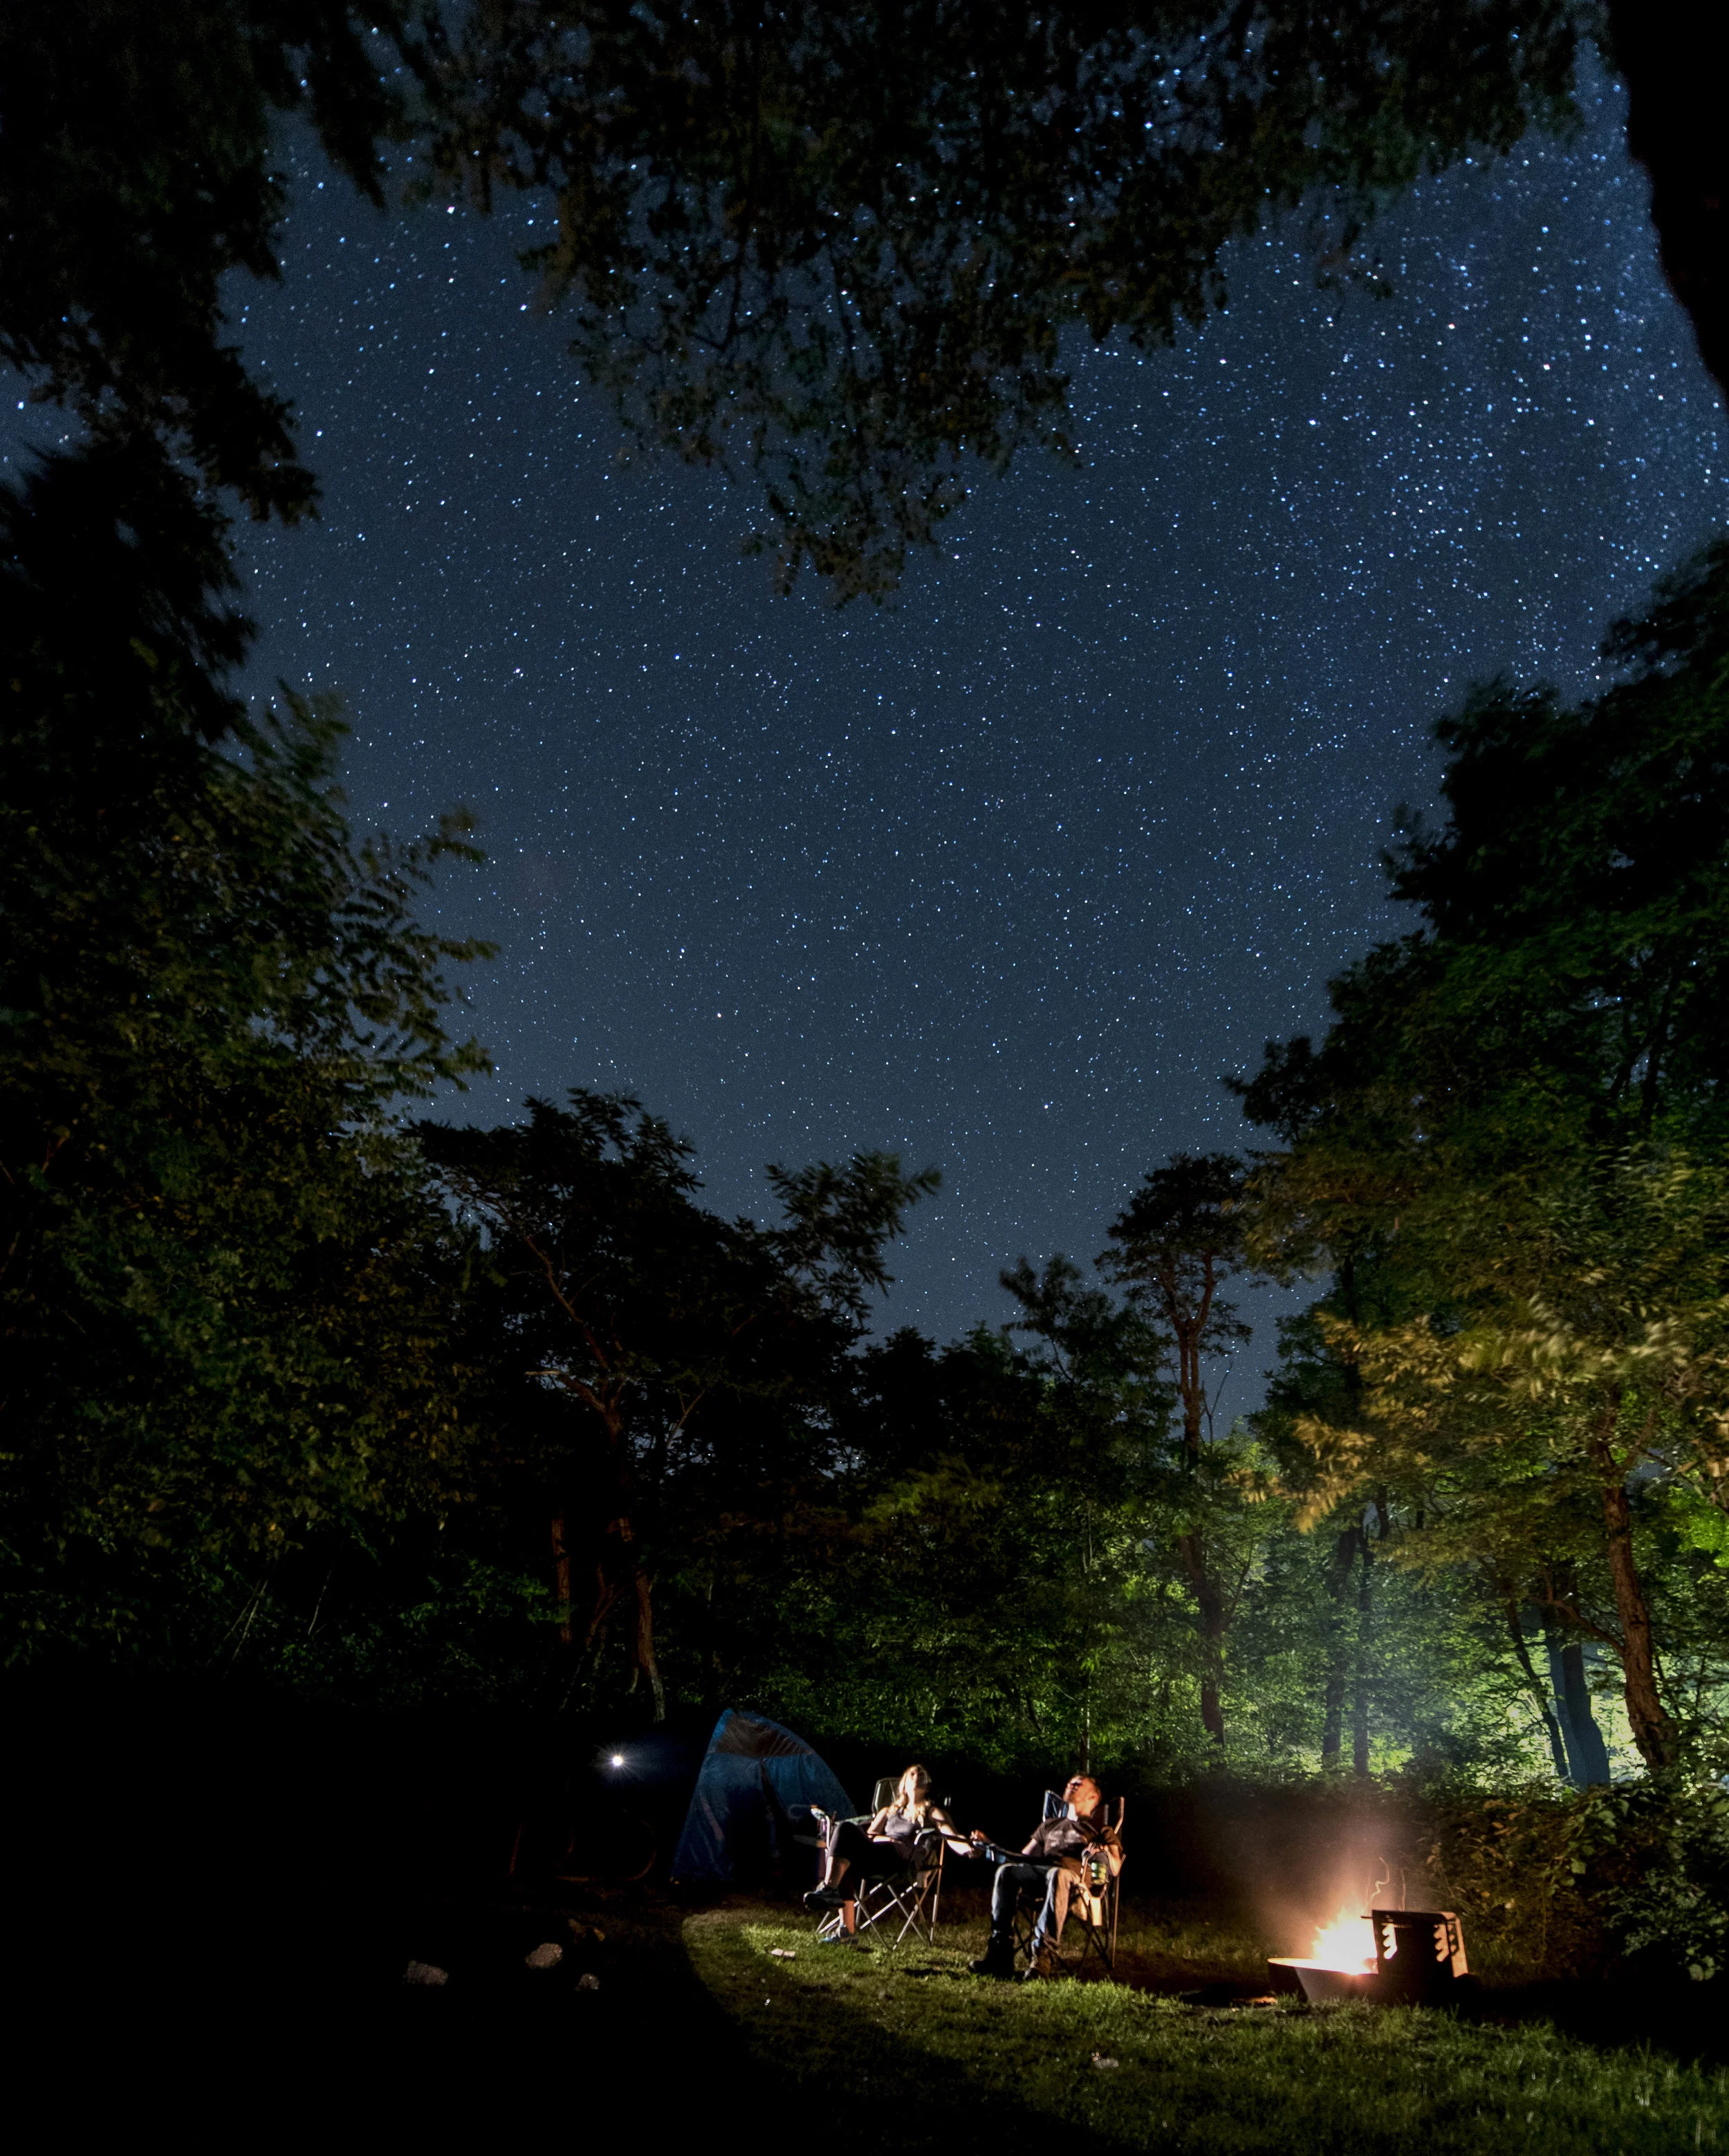
Some of the best star shots in my opinion are ones where the stars are simply a backdrop to something else. Play around with negative space. Here I used a low hanging branch to dip in creating the shape of a heart in the treetops. Using a campfire and a flashlight I was able expose for my fiance and I underneath the stars on a camping trip to finish a romantic themed photo. This was during our weekend getaway to the Shenandoah Mountains.
Give your audience an anchor, some subject matter other than just a sky full of stars. This will add interest to any photo. Make the stars secondary to the image. The best photos in my opinion show us something in a way we don't often see it.

One last thing is when you get back to your computer, go gentle on the post processing. It is very easy to want to slam your contrast and clarity and saturation all the way up, but it will just end up making the image look dirty.

Thank you for reading, I hope this helped. If you have any more questions about star photos or want to learn about something else photo related, leave a reply in the comment section!
You can also follow me on instagram.

How a camera works
If you are interested in learning more about your camera or photography in general, comment below!
Have you ever wondered what makes that iphone camera of yours works so well? Have you ever wondered the differences between todays digital cameras and the old film SLR's used by our parents and grandparents? In this blog post we are going to tackle the science and early history behind how the camera actually does what it does!
The first thing to know is that light moves in straight lines. We see this all the time, it is not that revolutionary of an observation. Think of light passing through an old vintage keyhole with a light on the other side because you know, that happens all the time....
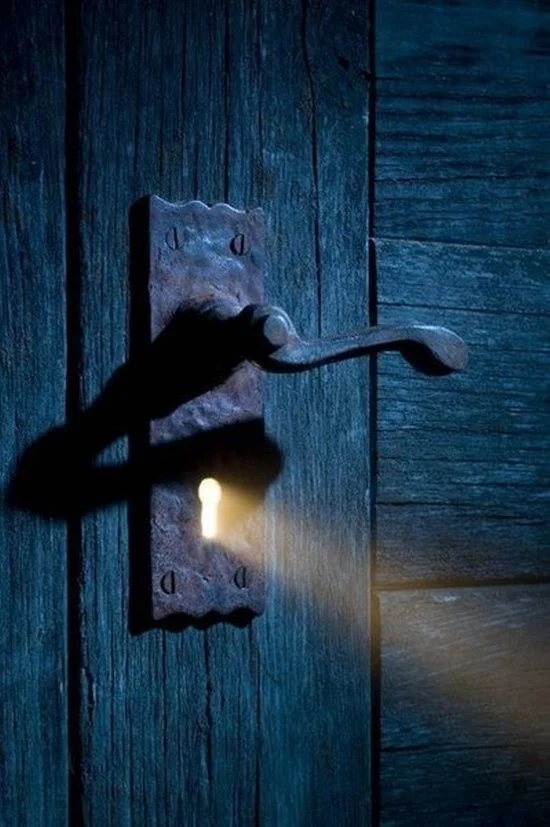
Now as far back as 400BC, the founder of Mohism, Mo-ti is attributed with the first observation of what happens when light is forced through a pinhole. It is a really weird phenomenon which makes not only a camera, but your visual perception possible. He observed that in a dark room, if you only allow light to enter through one small hole or "aperture" whatever you would see looking out through the hole, is actually projected onto the opposite wall, upside down.
This physical property of light was first called the Camera Obscura. Imagine you are standing in a box, picture that, whatever kind of box you want provided it is 100% sealed from light. It is pretty dark and scary in that box isn't it? We better let some light in....
If you were to take a knife or needle or whatever your preferred poking instrument is... If you were to make a small hole on one side of the box you would be forcing light to travel into that box through a straight line. Now turn around and face the wall opposite the hole.... If your box was located in the Roman forum, you would probably see something that looks like this.

Pretty cool right? It is because of this weird property of light which makes photography possible at all. This is also how your eye works. Your pupil acts like a pinhole in a dark room. You can turn your room into a Camera Obscura like the one shown above. You can also go visit some which are tourist attractions on the West coast (1450 Ocean Ave, Santa Monica, CA 90401) and East coast (Front Street, Mitchell Park, Greenport, NY11944.)
Now if we knew this in 400BC, why did it take until the 19th century to take the first photo? Well! The trick wasn't getting the image on the wall, it was printing the image and making it permanent. The first person to figure this out was Joseph Nicéphore Niépce in 1826 or 1827. He took a photo from his window which looks over his estate. Back in the day, only people wealthy enough to have free time and funds to purchase chemistry sets made photographs. It was thought of as an interesting hobby rather than a form of art.
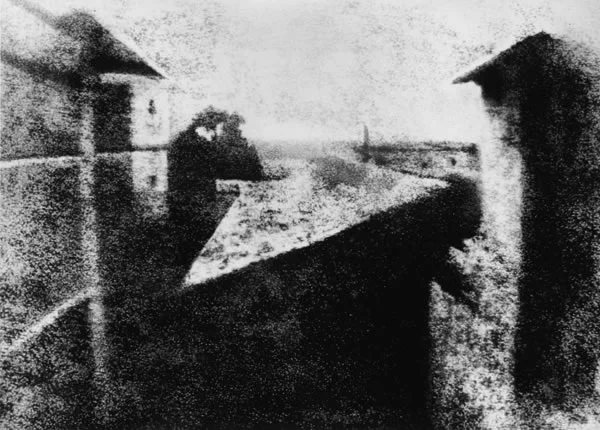
Now in order to get this image, he coated a pewter plate with a solution of bitumen he had previously experimented with. He placed it in the pinhole box (camera) and let the light hit the plate for eight hours, hardening the solution where it was touched by light. After exposing the plate, he rinsed it with lavender oil and white petroleum which washed away the bitumen that had not hardened during the eight hour exposure.
Everything from this point up to the advent of digital cameras has been a refining of this concept and process. Different chemicals were used, lenses were added to the pinhole light-boxes, and people sued each other over copyrights in an attempt to make a quick buck. The pewter plate would turn into metal tins, then glass plates, and eventually film.
It wasn't long before George Eastman's Kodak company brought a refined process to the public on an unprecedented scale. Using light weight film as oppose to heavy glass plates, they sold small film cameras which could be bought, sent to Kodak where they would be processed and printed, and sent back to the customer. Anyone born before 1995 remembers taking their photos on the little yellow kodak cameras and waiting a week to get their film developed.
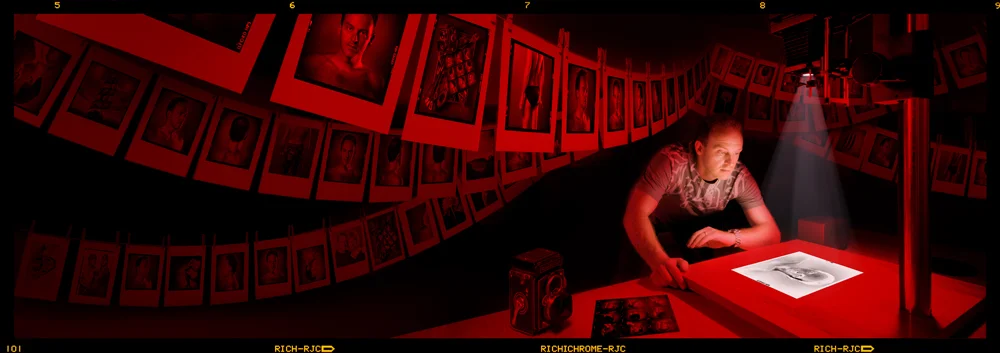
Throughout the 20th century, most photographs you see where gelatin silver prints. These were the modern film SLR cameras used by Ansel Adams, Yousuf Karsh, and even Anne Leibowitz up until digital became the norm. Think about all the old tv shows which show a young scrappy photojournalist who converted a bathroom into their darkroom. Now a digital camera works exactly like a film camera with one important difference...
Instead of film strip sitting on the back wall of our special box, a digital camera has a sensor. I wont go into the detailed process of building it, you can read about it here. But the spoiler is that Steven Sasson, a 24 year old working at Kodak, figured out how to use a Charged Coupling Device (C.C.D.) to capture an image. Instead of physically burning the image onto a light sensitive film, it is burning the image into an electronic signal through the light sensitive CCD panel.
Further and further refinement through innovations of the 21st century have led us to where we are now. Everyone these days has a camera built into their phone. The technology is only going to get better moving forward as it has been for the last century and a half.
Now a days everyone is a photographer. I hope with this blog, we can move forward by making everyone a better photographer. If you are interested in learning more about your camera or photography in general, email me or comment below!
Sources:
http://www.obscurajournal.com/history.php
http://www.hrc.utexas.edu/exhibitions/permanent/firstphotograph/process/#top
New Composition Gif's
I just found this series of .Gif's somewhere on the interwebs. These are simple tricks and tips even you iPhone photographers can use to make your photos stand out!
Check out all of the images HERE
Remember, all rules are made to be broken, but think of this as a set of guidelines to follow.
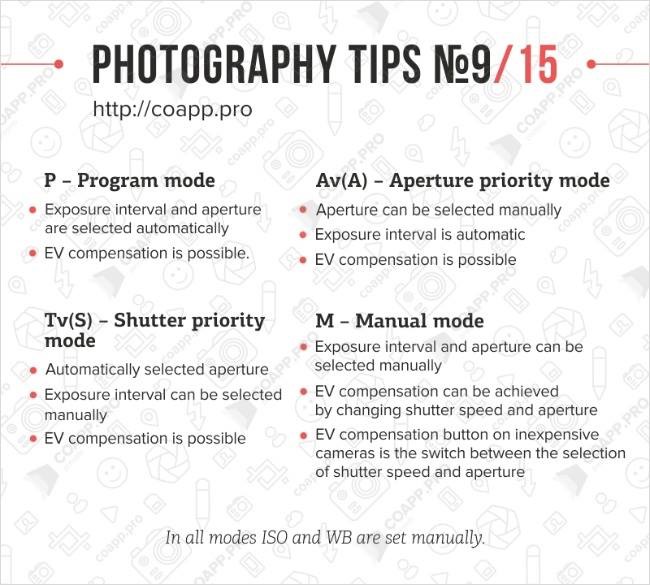
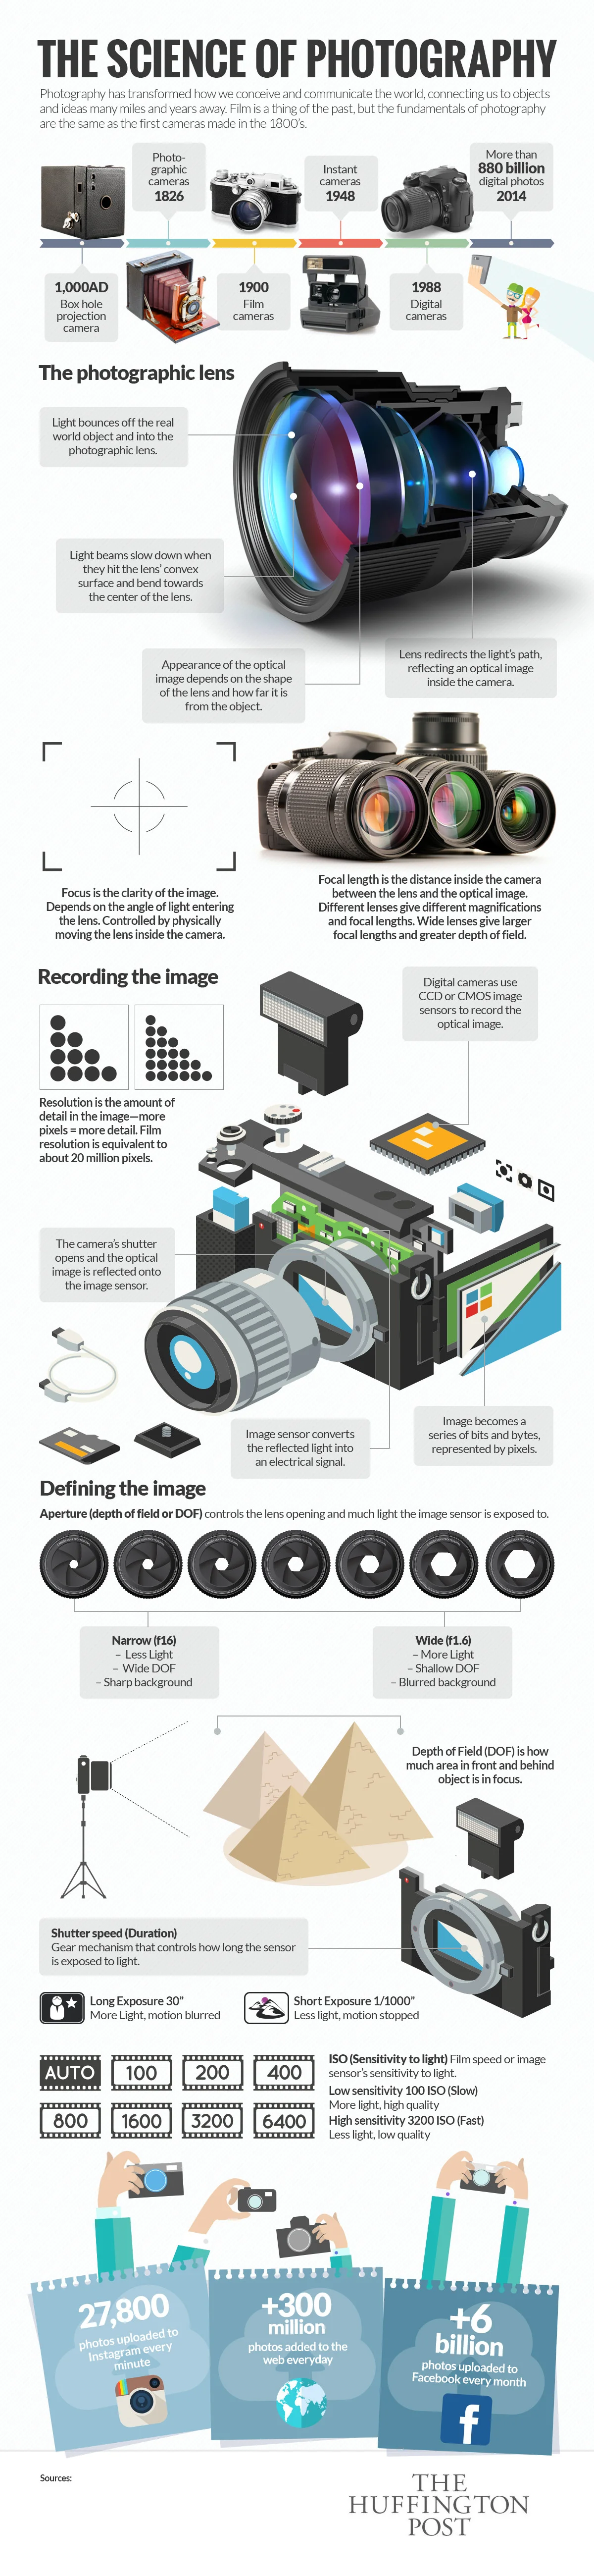
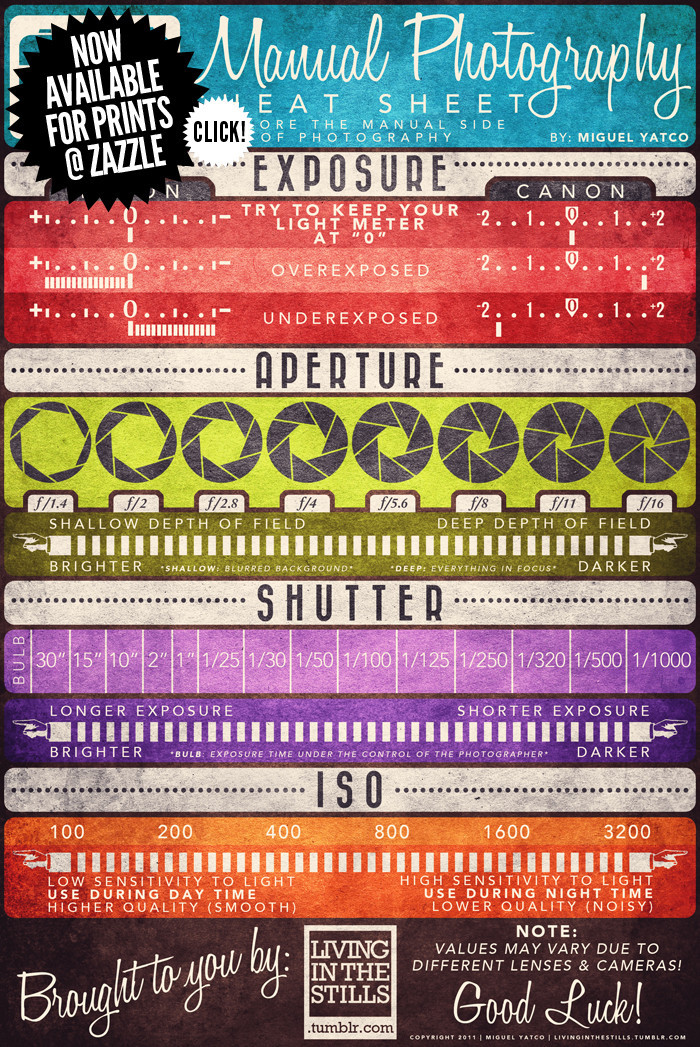
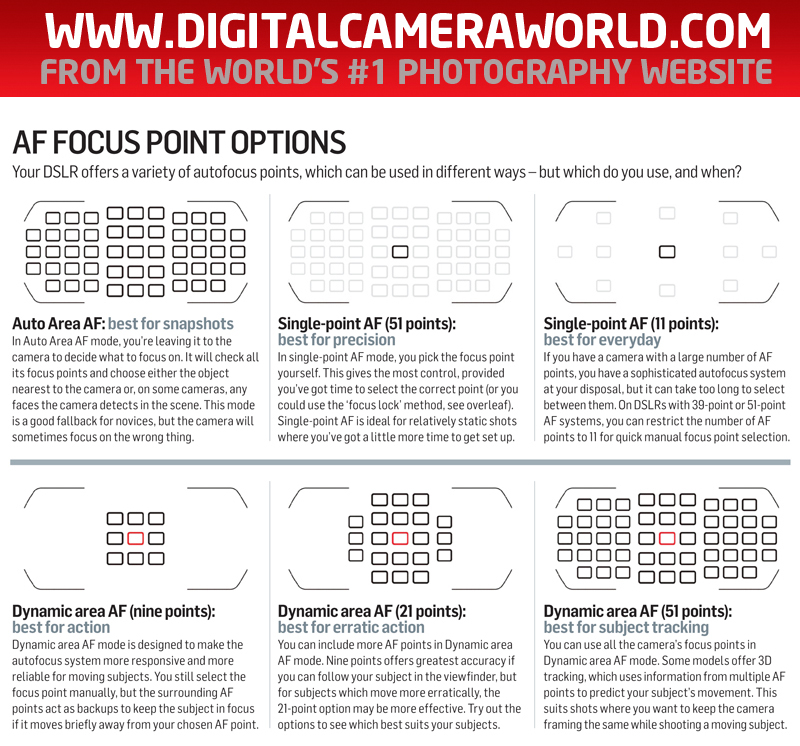
Photo Guide Infographics
Here are some well organized infographics I found that can help you understand photography! I will be sure to keep updating as I find more.









Cold weather Vs your camera.
Protect your gear! Click the link above to be forwarded to a B&H Infographic!